
Injection molding is a precise process, but sometimes things go wrong. Parts may have sink marks, weld lines, or warpage. These injection molding defects can ruin a product and increase costs. The good news? Most defects have clear causes and simple fixes. This guide explains common defects, why they happen, and how to solve them. Whether you’re an engineer or a buyer, understanding these issues helps you work better with your molder. Let’s look at the most frequent problems and their solutions.
Sink Marks
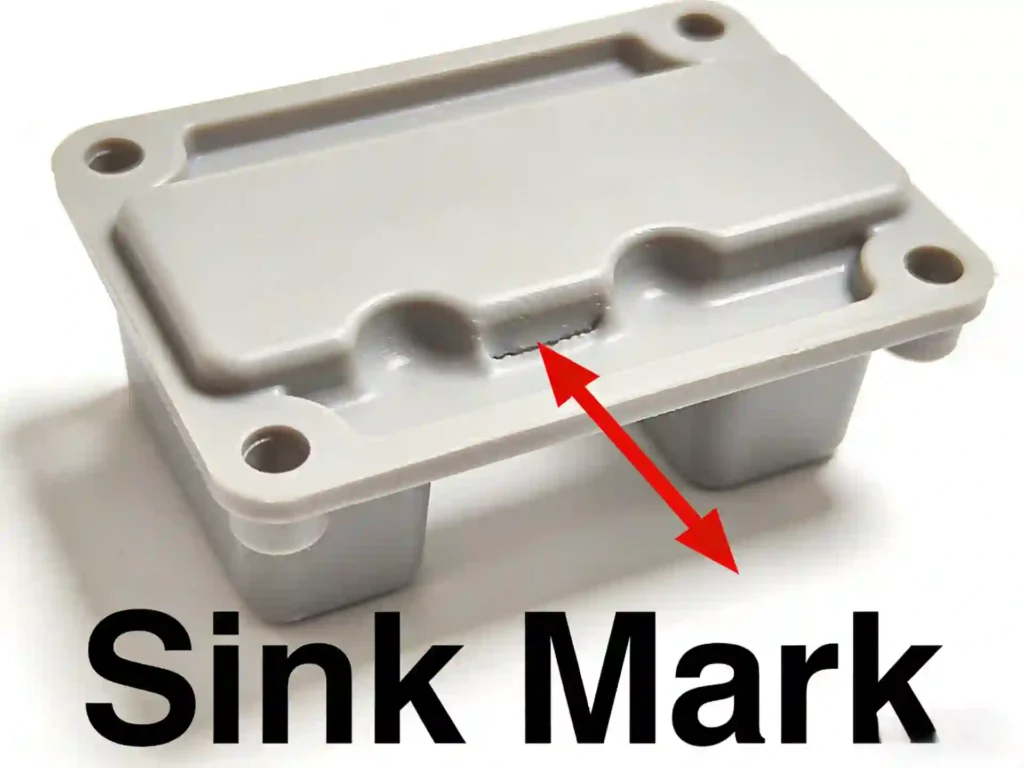
What Are Sink Marks?
Sink marks are small depressions on the surface of thick areas. They look like dimples or shallow valleys. They happen when the inside of the part cools slower than the outside. The shrinking material pulls the surface inward.
Common Causes
- Thick walls or ribs that are too thick
- Not enough holding pressure
- Short cooling time
- Gate freezes too early
How to Fix Them
- Reduce wall thickness. Keep walls uniform.
- Increase holding pressure and time.
- Move the gate to thick areas so material can pack better.
- Add cooling time to let the part solidify fully.
Real example: We once had a client with deep sink marks on a boss. We added a small core in the mold to reduce wall thickness. The sinks disappeared.
Weld Lines
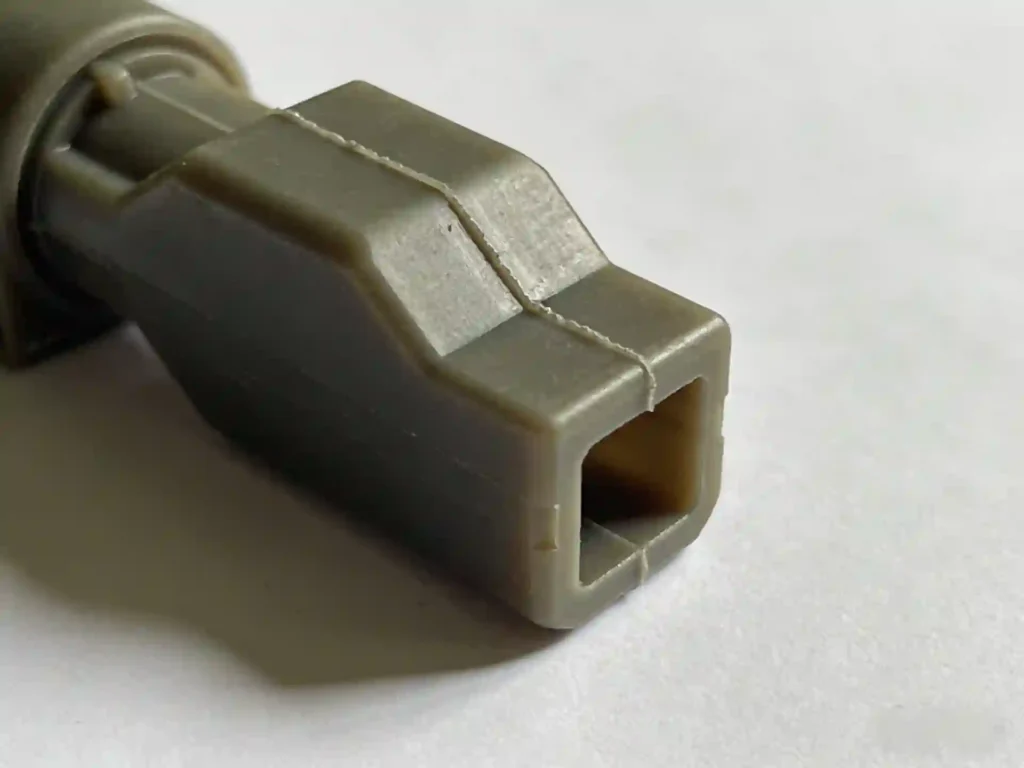
What Are Weld Lines?
Weld lines (or knit lines) are visible lines where two flow fronts meet. They can be weak points. They often appear around holes or where the plastic splits and comes back together.
Common Causes
- Multiple gates or flow around obstacles
- Low melt temperature
- Slow injection speed
- Poor venting
How to Fix Them
- Raise melt temperature to improve flow.
- Increase injection speed.
- Improve venting to let air escape.
- Relocate gates or change part design to avoid flow splitting.
When to Worry
Not all weld lines are bad. If the part is purely cosmetic, a faint line may be okay. For structural parts, you need to test strength. Our injection molding design guide covers how to position gates to minimize weld lines.
Warpage
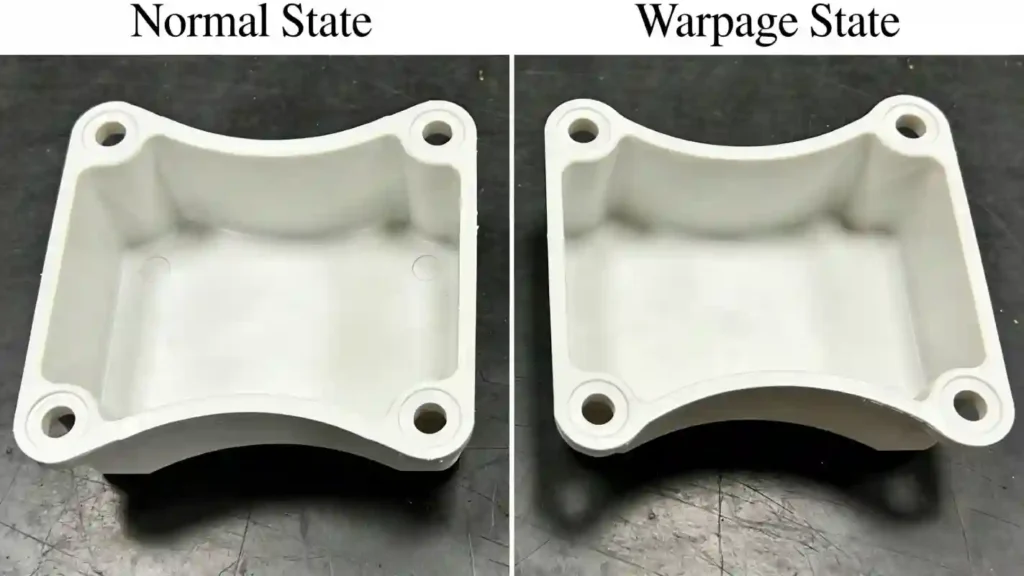
What Is Warpage?
Warpage is when a part twists or bends after molding. It does not hold its intended shape. This happens because different areas cool at different rates.
Common Causes
- Uneven wall thickness
- Non-uniform cooling
- Material shrinkage differences
- Mold temperature too low or uneven
How to Fix It
- Design uniform wall thickness.
- Balance cooling channels in the mold.
- Use materials with lower shrinkage.
- Increase mold temperature to slow cooling.
Case point: A large flat part warped badly. We added cooling lines near the center and adjusted cycle times. The part came out flat.
Short Shots
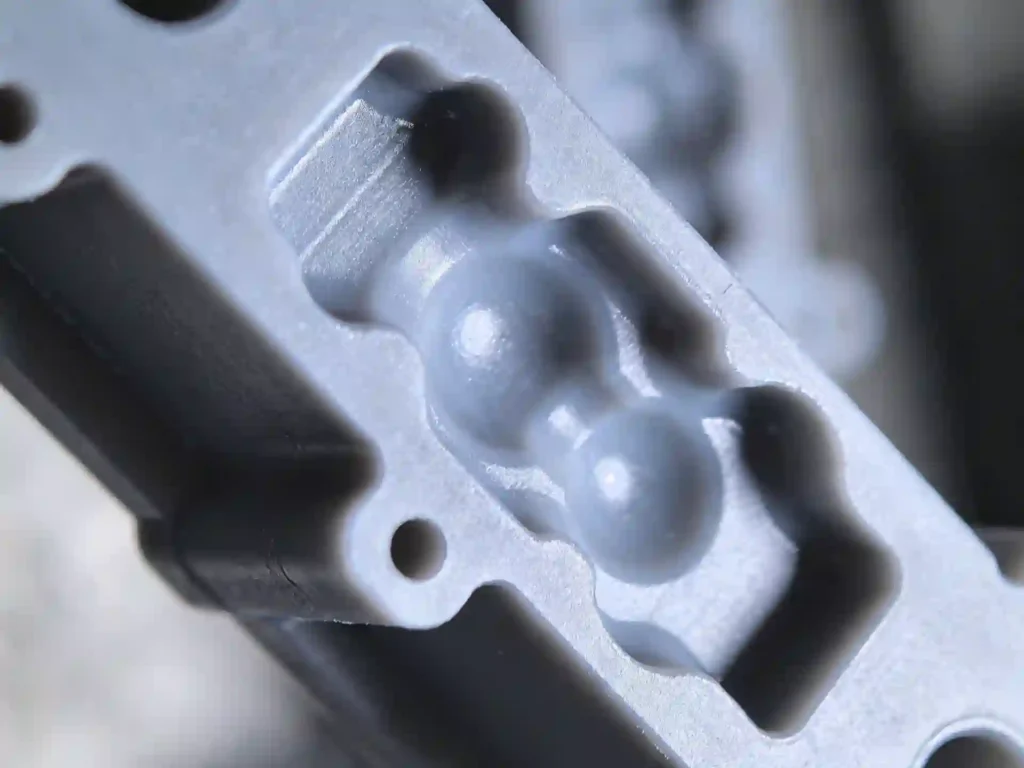
What Are Short Shots?
A short shot is when the mold cavity does not fill completely. Part of the part is missing. It looks like the plastic ran out before reaching the end.
Common Causes
- Low injection pressure or speed
- Insufficient material in the shot
- Clogged nozzle or gate
- Trapped air preventing flow
How to Fix Them
- Increase injection pressure and speed.
- Check material feed – make sure there’s enough.
- Clean nozzle and gates.
- Add vents to let air escape.
Quick tip: If short shots happen only sometimes, check for inconsistent material feeding.
Flash
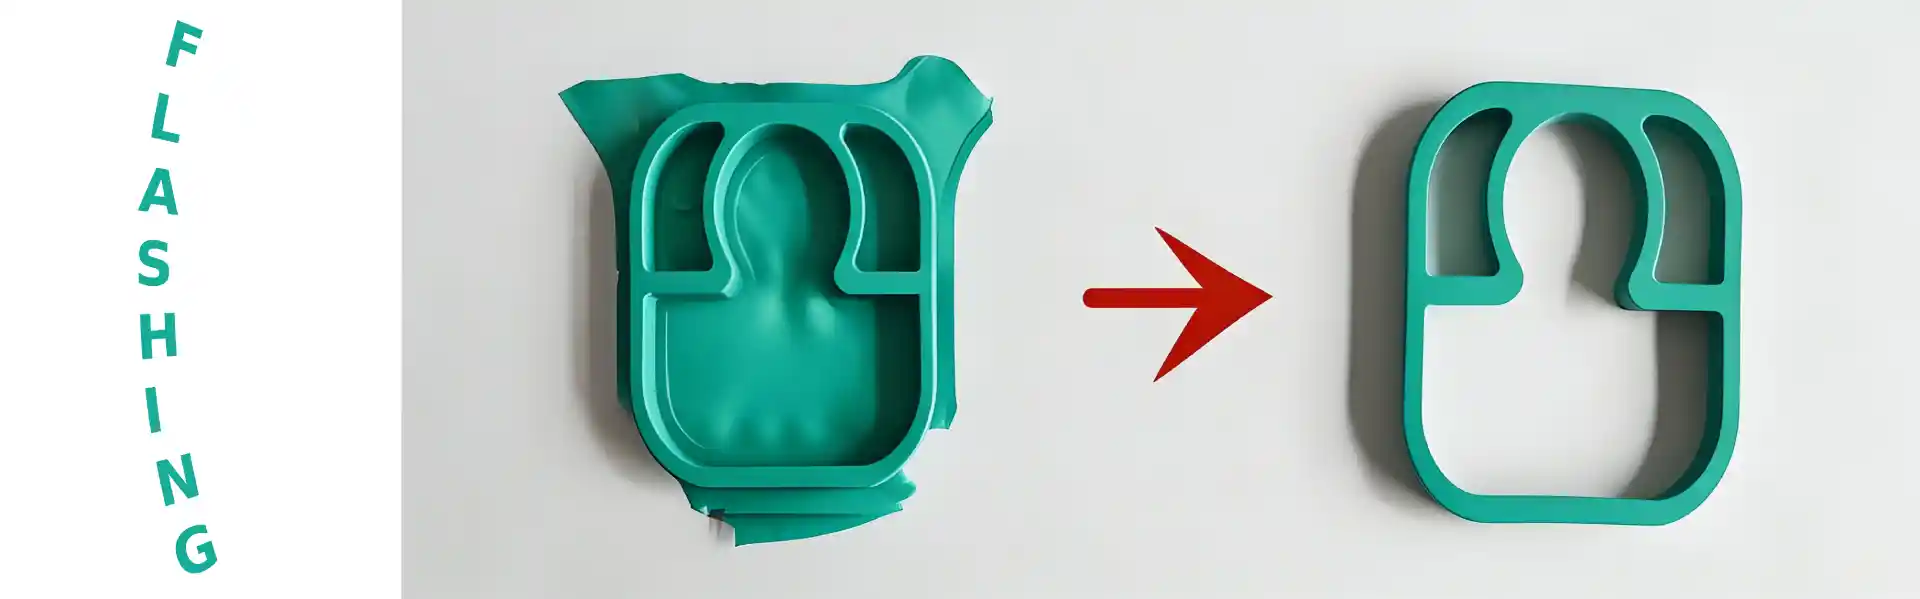
What Is Flash?
Flash is a thin layer of plastic that squeezes out of the mold at the parting line. It looks like a fin around the part edge.
Common Causes
- Mold not clamping tight enough
- Injection pressure too high
- Mold damage or worn parting line
- Material too fluid (low viscosity)
How to Fix It
- Increase clamp force.
- Reduce injection pressure.
- Repair or reface the mold.
- Switch to a material with higher viscosity if possible.
Warning: Flash can be dangerous if it interferes with part function. Always trim it, but better to prevent it.
Burn Marks
What Are Burn Marks?
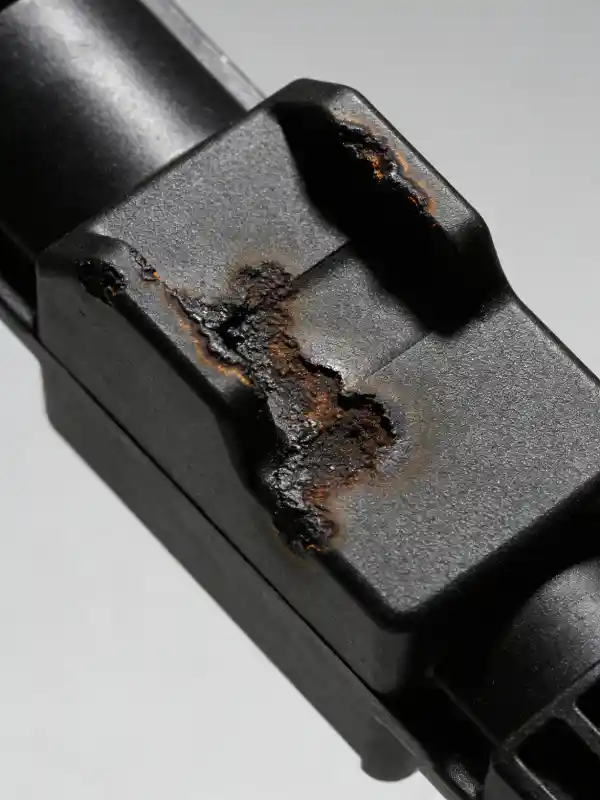
Burn marks appear as black or brown spots on the part. They look burnt. They happen when trapped air gets very hot or when material degrades.
Common Causes
- Poor venting – air compresses and ignites
- Melt temperature too high
- Material sitting too long in the barrel
- Screw speed too fast
How to Fix Them
- Improve venting in the mold.
- Lower melt temperature.
- Reduce residence time (use smaller barrel if needed).
- Slow down screw speed.
Flow Lines
What Are Flow Lines?
Flow lines are rings or streaks on the part surface. They look like ripples. They form when the material flows unevenly.
Common Causes
- Injection speed too slow
- Melt temperature too low
- Small gate size
How to Fix Them
- Increase injection speed.
- Raise melt temperature.
- Enlarge gates to improve flow.
Jetting
What Is Jetting?
Jetting looks like snake-like squiggles on the part surface. It happens when the material shoots through a gate and into the cavity without hitting the wall first. It folds and cools in a messy pattern.
Common Causes
- Gate aimed directly into open space
- Injection speed too high at start
- Gate size too small
How to Fix It
- Relocate gate so material hits a wall immediately.
- Use a slower injection speed at the start, then speed up.
- Enlarge gate.
Systematic Troubleshooting Approach
When you see defects, don’t guess. Follow a step-by-step process.
Step 1 – Identify the Defect
Look closely. Is it a sink mark? Flash? Write down where it appears.
Step 2 – Check Process Parameters
Review machine settings. Compare them to the last good run. Temperature, pressure, speed – any changes?
Step 3 – Inspect the Mold
Look for damage, wear, or contamination. Check vents and cooling lines.
Step 4 – Evaluate Material
Is the material dry? Is it the right grade? Moisture causes many defects.
Step 5 – Make One Change at a Time
Change one variable, run a few parts, and see what happens. Changing multiple things at once hides the real cause.
Example: A client had random short shots. We found the material hopper was not feeding consistently. A simple fix saved thousands.
Prevention – Design for Manufacturing
Most defects start in design. Good design prevents problems.
- Keep wall thickness uniform (0.040–0.140 inches typical).
- Add draft angles (1–2 degrees minimum).
- Use ribs instead of thick walls.
- Place gates where flow is smooth.
- Talk to your molder early.
Our design guidelines for injection molding cover these rules in detail.
When to Call an Expert
Some defects need deep experience. If you’ve tried fixes and still have problems, ask for help. A fresh pair of eyes can spot what you missed.
At Miracles Manufacturing, we troubleshoot defects daily. We look at the part, the mold, and the process. We find the root cause fast. Then we fix it – often with small changes that make a big difference.
Frequently Asked Questions
Q1: Can sink marks be fixed after molding?
A: No, sink marks are permanent. You must adjust the process or redesign the part.
Q2: Are weld lines always weak?
A: Not always. Test the part. If strength is okay, the line may be only cosmetic.
Q3: How much warpage is too much?
A: Depends on your tolerance. If the part doesn’t fit or function, it’s too much.
Q4: What is the most common defect?
A: Sink marks and flash are very common, especially in new molds.
Q5: Can material cause defects?
A: Yes. Wet material causes splay. Contaminated material causes black specks. Always dry material properly.
Summary
Injection molding defects are frustrating, but they are solvable. Start with the basics: check design, process, mold, and material. Use a systematic approach. And when in doubt, ask an expert.
We hope this injection molding defects guide helps you. Bookmark it and share it with your team.