
Insert Molding & Overmolding Services
Not all plastic parts are made from a single material. Some need metal inserts for threads or strength. Others combine a rigid core with a soft‑touch surface. That is where insert molding and overmolding come in. At Miracles Manufacturing, we offer comprehensive insert molding services and overmolding services for applications ranging from automotive components to medical devices and consumer products. Our engineers have decades of experience designing molds and processes that ensure perfect bonding, precise insert placement, and reliable performance. This page explains both processes, when to use them, and how our expertise helps you avoid common pitfalls.
What Is Insert Molding?
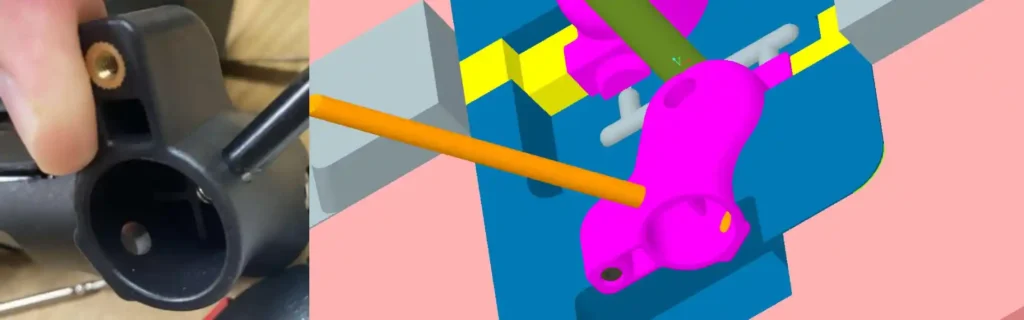
Insert molding is a process where metal or other components are placed into the mold before plastic is injected. The plastic flows around the insert, creating a permanent bond. Common inserts include:
- Threaded brass nuts and studs
- Electrical contacts and pins
- Metal reinforcement plates
- Ceramic or glass components
- Filter mesh
How it works:
- Inserts are loaded into the mold cavity (manually or by robot)
- The mold closes
- Molten plastic is injected, surrounding the insert
- After cooling, the part ejects with the insert permanently encapsulated
Benefits:
- Stronger than post‑assembly: Plastic shrinks around the insert, creating a mechanical lock.
- Faster production: One step instead of molding then pressing inserts.
- Better reliability: No loose inserts, no secondary operations.
- Design freedom: Complex assemblies can be consolidated into one part.
For a complete overview of our capabilities, visit our custom injection molding services page .
What Is Overmolding?
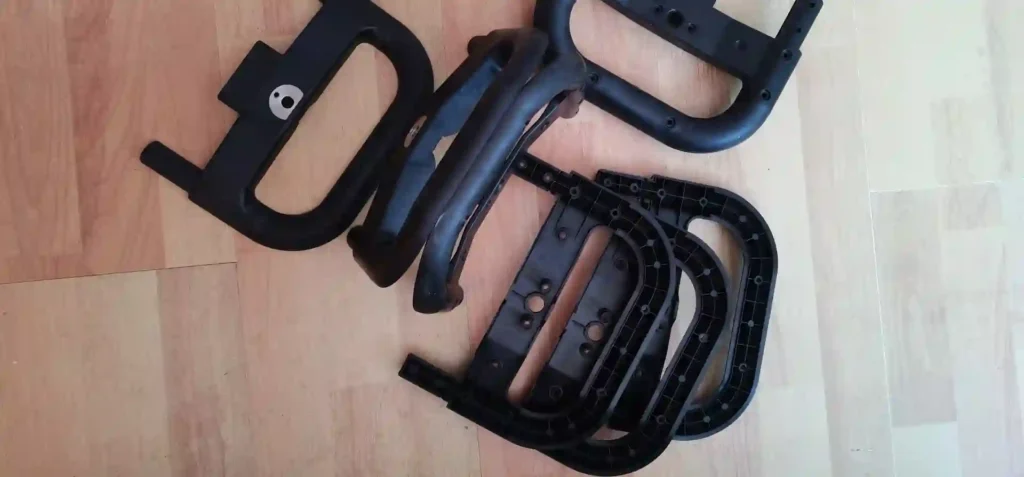
Overmolding is a process where a second material is molded over a first substrate. The substrate can be plastic, metal, or even fabric. The second material bonds chemically or mechanically to create a finished part.
Common applications:
- Soft‑grip handles: Hard plastic core + soft TPE overmold
- Seals and gaskets: Flexible material bonded to a rigid frame
- Multi‑color parts: Different colors for branding or function
- Metal overmolding: Encapsulating metal components for insulation or protection
Two methods:
- Two‑shot molding: Both materials are molded in the same machine, with the mold rotating between shots. Ideal for high volume.
- Pick‑and‑place overmolding: The first part is molded, then transferred to a second mold for overmolding. More flexible for lower volumes.
For complex multi‑material projects, explore our advanced injection molding capabilities .
Why Choose Miracles for Insert Molding & Overmolding
Decades of Experience
Our engineers have completed thousands of insert molding and overmolding projects. We know how to design inserts to anchor securely, select compatible materials, and control the process to ensure perfect bonding.
Automated Insert Loading
For high‑volume production, we use robotic insert loading systems. This ensures consistent placement, reduces cycle time, and eliminates operator error.
Material Compatibility Expertise
Not all plastics bond to metal – and not all TPEs bond to all rigid plastics. We help you choose material pairs that form strong, durable bonds. We work with leading resin suppliers to source the right grades.
In‑House Mold Design
Our toolmakers design molds specifically for insert molding and overmolding, with features like:
- Insert nests with locating features
- Slides or lifters for complex geometry
- Hot runner systems for two‑shot molding
Real‑scenario example: A client needed a power tool handle with a metal insert for strength and a soft‑grip overmold for comfort. Our team designed a two‑shot mold that produced the complete handle in one cycle – rigid core first, then TPE overmold. The part passed all durability tests and reduced assembly costs by 40%.
Insert Molding – Key Design Considerations
Insert Design
Inserts must be designed to anchor securely in the plastic. Common features:
- Knurling or grooves
- Flanges or undercuts
- Holes that fill with plastic
- Threaded sections (for subsequent assembly)
Insert Placement
Inserts must be held precisely in the mold. We design nests that locate the insert without damaging it. For automated loading, we ensure consistent orientation.
Material Selection
The plastic must flow well around the insert without damaging it. For metal inserts, we consider:
- Shrinkage – plastic shrinks onto the insert; too much shrinkage can crack the insert or the plastic
- Thermal expansion – mismatch can cause stress
- Chemical bonding – some plastics bond chemically to metal with special additives
Gate Location
Gates should be placed so the plastic flows around the insert evenly, avoiding jetting or weld lines near the insert.
Stress Relief
Residual stress around inserts can cause cracking. We use mold flow simulation to optimize gate location and processing conditions to minimize stress.
Overmolding – Key Design Considerations
Material Compatibility
For a strong bond, the two materials must be compatible. Common pairs:
- ABS + TPE
- PC + TPE
- Nylon + TPV
- PP + TPE (special grades)
We can recommend the right combination for your application.
Bonding Mechanism
Overmolding bonds can be:
- Chemical: Materials fuse at the molecular level (requires compatible polymers)
- Mechanical: Undercuts or holes in the substrate create a mechanical lock
- Adhesive: A separate adhesive layer (less common in injection molding)
Substrate Design
The first‑shot part should have features that help the second material bond:
- Undercuts or ribs
- Textured surfaces
- Through‑holes for mechanical lock
Gate Location
The second shot must fill without disturbing the substrate. We place gates to avoid jetting or eroding the first material.
Shrinkage Matching
If the two materials shrink at different rates, the part may warp. We select materials with similar shrinkage or design features that accommodate the difference.
For a deeper dive into design principles, see our injection molding design guidelines .
Common Applications
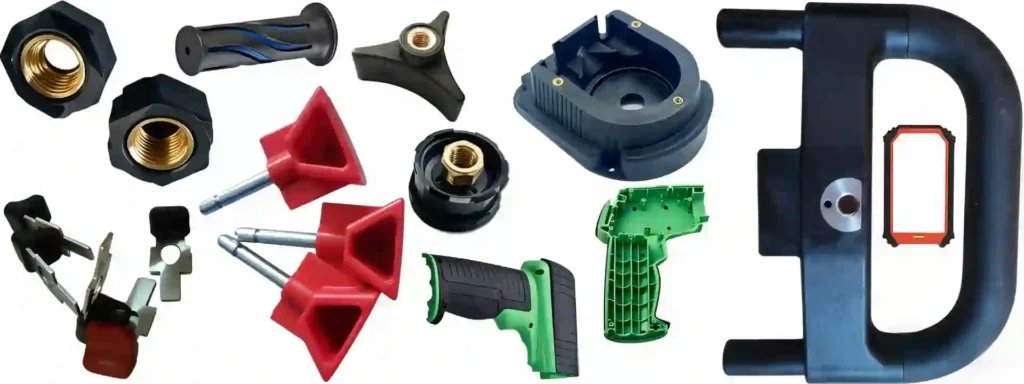
| Industry | Insert Molding | Overmolding |
|---|---|---|
| Automotive | Threaded inserts for mounting points | Soft‑grip steering wheel components, seals |
| Medical | Metal hubs in catheters, syringe tips | Soft‑touch handles for surgical instruments |
| Electronics | Connector pins, shielding cans | Waterproof seals for enclosures |
| Consumer | Knife handles with metal tangs | Toothbrush handles, power tool grips |
| Industrial | Wear plates in plastic parts | Anti‑vibration grips |
Our Process for Insert Molding & Overmolding
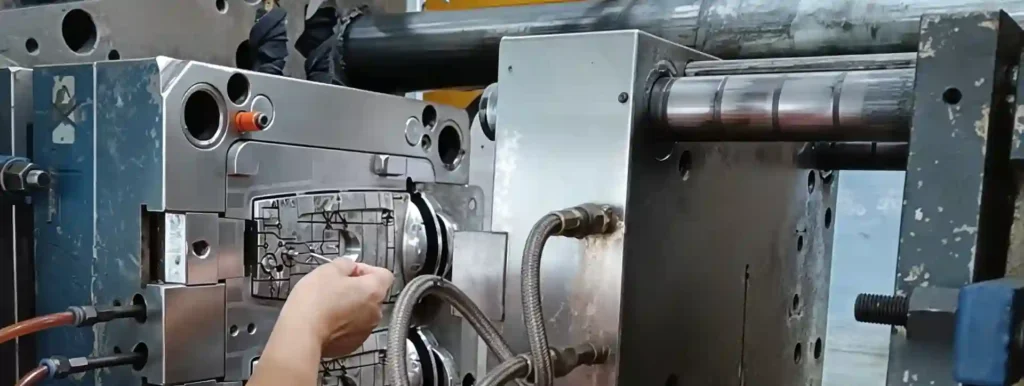
Step 1 – Design Review
Send us your 3D model. We review:
- Insert placement and retention features
- Material compatibility
- Gate locations
- Potential defects (weld lines, voids)
Step 2 – Material Selection
We recommend the best materials for your application – rigid plastics, elastomers, and insert materials. We source from trusted suppliers with full traceability.
Step 3 – Mold Design & Manufacturing
Our toolmakers design molds with:
- Precision insert nests
- Slides or lifters if needed
- Hot runner or cold runner systems
- Cooling optimized for both materials
Step 4 – Sampling & Testing
We run samples and test:
- Insert pull‑out strength
- Overmold bond strength
- Dimensional accuracy
- Visual appearance
Step 5 – Production & Quality Control
Once approved, we move to production. We monitor key parameters and inspect parts throughout the run.
Common Defects and How to Avoid Them
| Defect | Cause | Solution |
|---|---|---|
| Insert moves during molding | Poor retention in mold | Improve nest design, use robotics |
| Flash around insert | Insert not seated properly | Check insert dimensions, increase clamp force |
| Poor bond (overmold) | Incompatible materials, low temperature | Use compatible pair, increase melt temp |
| Sink marks over insert | Thick plastic over insert | Reduce plastic thickness, core out |
| Insert cracking | High stress, sharp corners | Add radius, adjust processing |
| Overmold short shot | Second material not flowing | Increase injection speed, check gate size |
Real‑scenario risk: A client had inserts that kept shifting during molding, causing misaligned threads. We redesigned the insert nest with tapered locating features and switched to robotic loading – the problem disappeared.
Frequently Asked Questions
Q1: What materials can be used as inserts?
A: Metals (brass, steel, aluminum), ceramics, magnets, circuit boards, and even other plastics. We can handle most rigid inserts.
Q2: Can you overmold TPE onto polycarbonate?
A: Yes, TPE bonds well to PC. We’ll help you choose the right TPE grade.
Q3: How strong is the bond in overmolding?
A: With compatible materials, the bond can be stronger than the materials themselves. We test bond strength to ensure reliability.
Q4: Do you offer automated insert loading?
A: Yes, for high‑volume production we use robots to load inserts quickly and precisely.
Q5: Can you combine insert molding and overmolding in one part?
A: Absolutely. For example, a part might have a metal insert for strength and a soft‑touch overmold for grip. We can design a multi‑step process to achieve this.
Q6: What is the lead time for insert molding tools?
A: Typically 5–12 weeks for production tools. Prototype tools can be ready in 3–5 weeks.
For troubleshooting bonding issues, refer to our injection molding defects guide .