Injection molding is the world’s most versatile manufacturing process for producing plastic parts at scale. From automotive components to medical devices, injection molding enables the creation of complex geometries with exceptional precision and repeatability. This comprehensive guide covers everything you need to know about plastic injection molding—from the step-by-step injection molding process to material selection, design principles, defect troubleshooting, and cost factors. Whether you’re an engineer, a procurement professional, or a business owner, this resource will help you make informed decisions and avoid costly mistakes.
What is Injection Molding?
Definition and Basic Principle
Injection molding is a manufacturing process that involves injecting molten material (typically thermoplastic or thermoset polymers) into a closed mold cavity under high pressure. Once the material cools and solidifies, the mold opens, and the finished part is ejected. The cycle repeats, enabling high-volume production of identical parts.
A Brief History
The first injection moulding machine (note the British spelling) was patented in 1872 by the Hyatt brothers. However, it wasn’t until the 1940s that the process gained industrial significance. Today, njection molding accounts for the majority of plastic parts produced worldwide.
Why Choose Injection Molding?
– High Efficiency: Cycle times range from seconds to minutes, ideal for mass production.
– Design Flexibility: Complex geometries, undercuts, and fine details are achievable.
– Material Versatility: Hundreds of thermoplastic and thermoset materials are available.
– Consistency: Once the mold is validated, every part is identical.
– Low Labor Costs: Highly automated, reducing per-part labor.
Explore our custom injection molding capabilities
The Injection Molding Process Step-by-Step
Understanding the injection molding process is essential for anyone sourcing parts. Here’s what happens in each cycle:
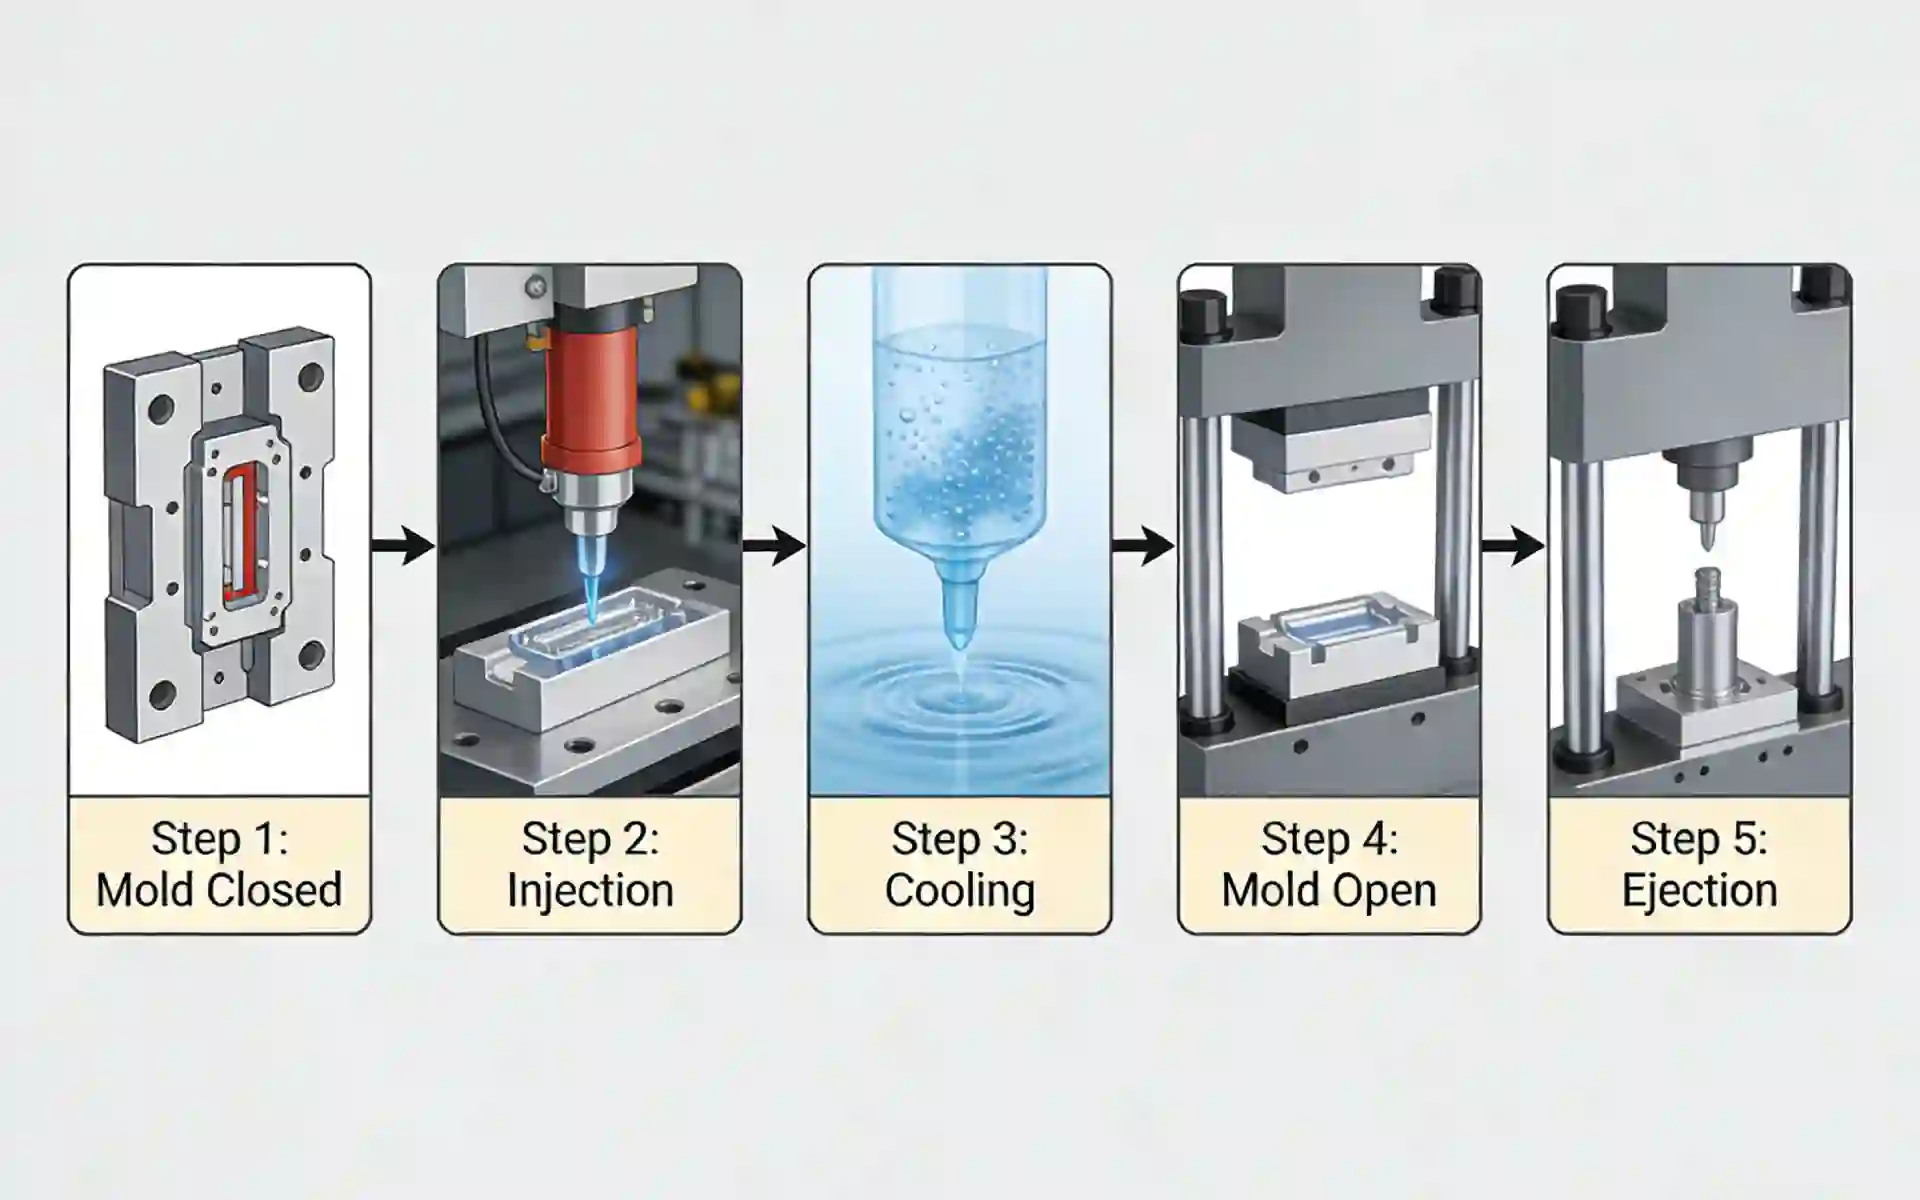
1. Mold Clamping
The two halves of the mold (the cavity and the core) are closed and clamped together by the molding machine’s clamping unit. The clamping force must exceed the injection pressure to prevent the mold from opening during injection.
2. Injection
Plastic pellets are fed from a hopper into a heated barrel. A rotating screw pushes the material forward, melting it through a combination of heater bands and shear heat. Once enough molten material (the “shot”) is accumulated, the screw moves forward, injecting the melt into the mold cavity at high pressure.
3. Cooling & Holding
After the cavity is filled, a holding pressure is maintained to compensate for material shrinkage as it cools. The cooling time is often the longest part of the cycle and directly impacts productivity.
4. Mold Opening & Ejection
Once the part is sufficiently cooled, the clamping unit opens the mold. Ejector pins push the part out of the cavity.
5. Reset & Repeat
The mold closes again, and the cycle repeats. Typical cycle times range from 10 to 60 seconds, depending on part size and wall thickness.
Our advanced injection molding equipment
Types of Injection Molding Machines
Hydraulic Injection Molding Machines
Traditional workhorses, hydraulic machines offer high clamping forces and are suitable for large parts. However, they consume more energy.
All-Electric Injection Molding Machines
Electric servo motors drive all movements. These machines are more precise, energy-efficient, and faster, making them ideal for high-precision components.
Hybrid Injection Molding Machines
Combining hydraulic clamping with electric injection, hybrids offer a balance of power and efficiency.
Decision Point for Buyers: If you need high-volume production of precision parts, all-electric machines are often the best choice. For very large parts (e.g., automotive bumpers), hydraulic or hybrid machines may be more cost-effective.
Choosing the wrong machine type can lead to higher per-part costs or quality issues. Always verify your supplier’s equipment capabilities.
Injection Molding Materials Guide
Material selection is one of the most critical decisions in plastic injection molding. The wrong material can lead to part failure, increased costs, or production delays.
Thermoplastics vs. Thermosets
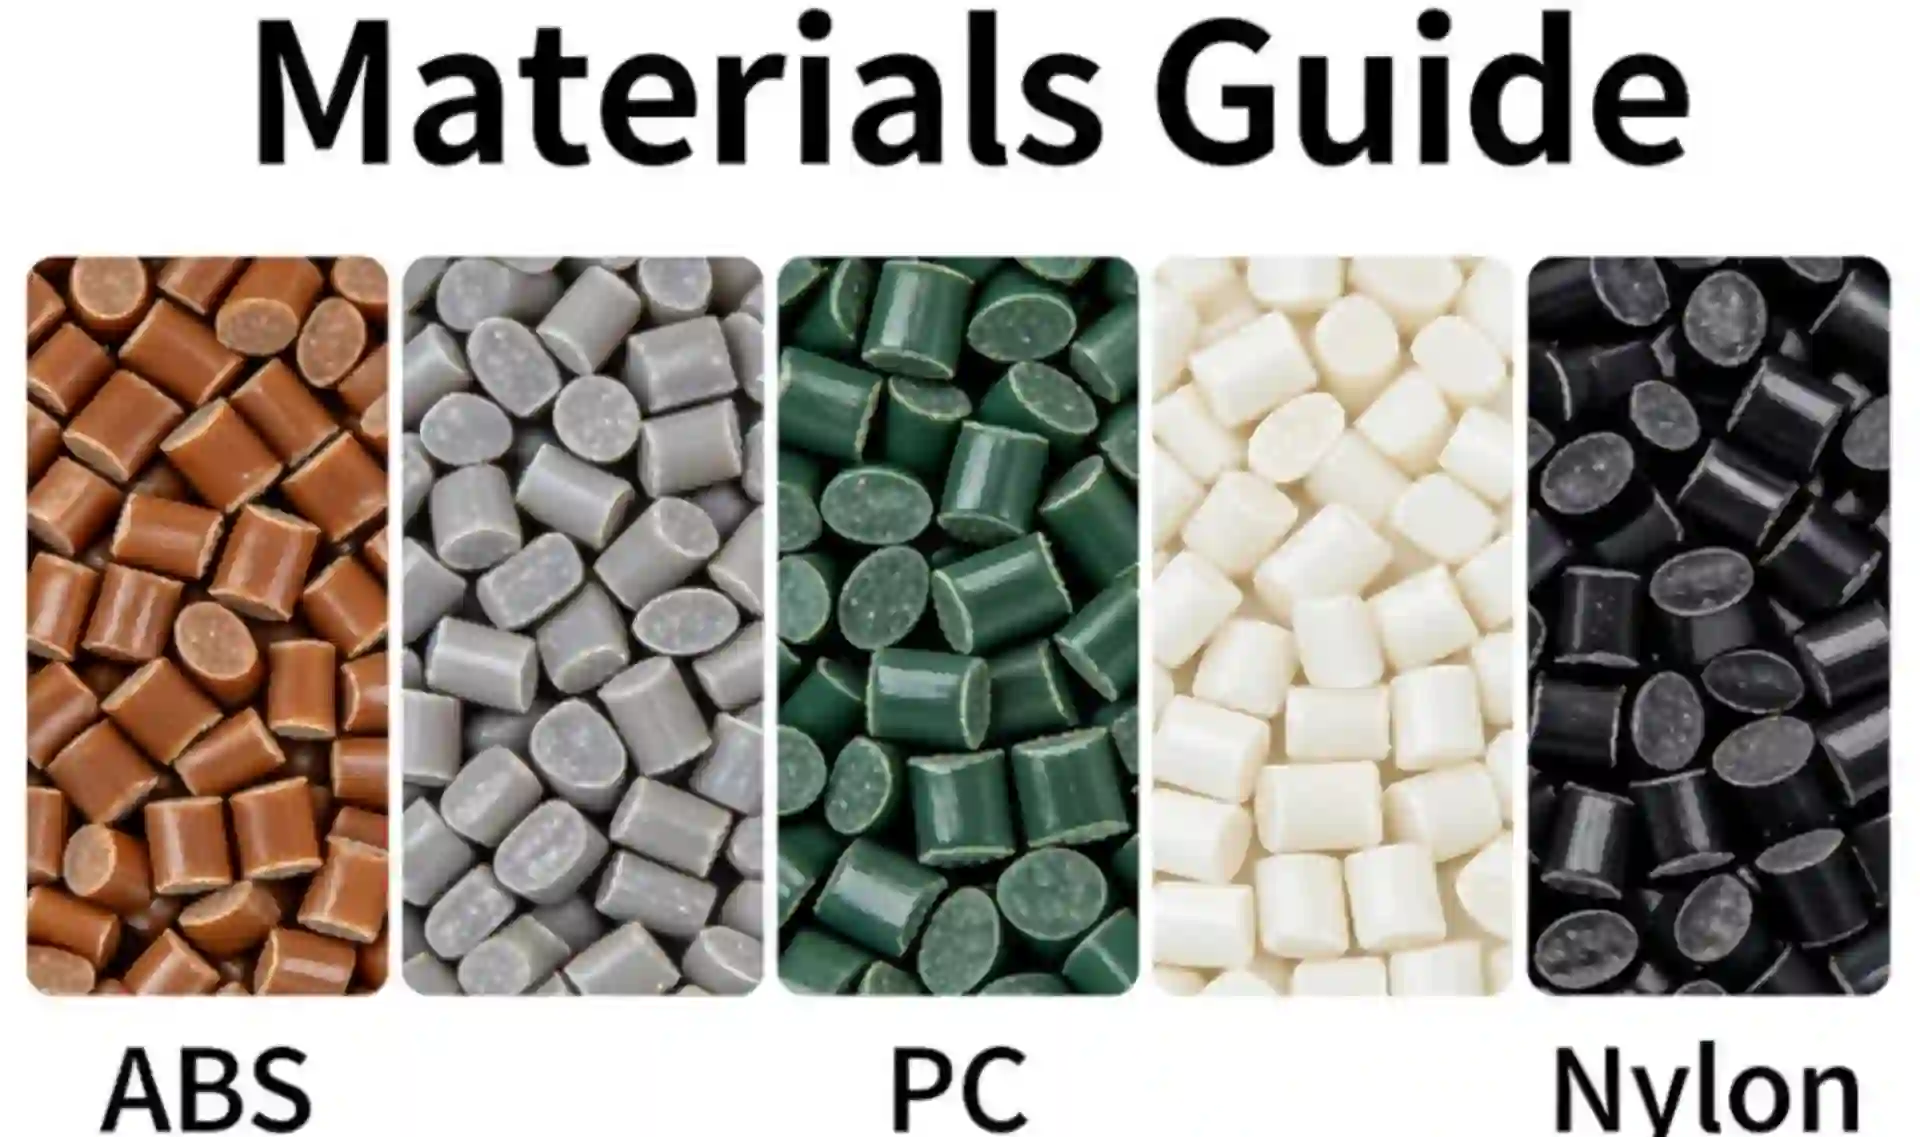
- Thermoplastics: Melt when heated and solidify when cooled. They can be re-melted, making them recyclable. Examples: ABS, PC, PP, Nylon.
- Thermosets: Undergo a chemical change during molding and cannot be re-melted. They offer superior heat resistance. Examples: Epoxy, Phenolic.
Common Thermoplastics for Injection Molding
| Material | Key Properties | Typical Applications |
|---|---|---|
| ABS | Impact-resistant, tough, good surface finish | Electronic enclosures, automotive interior parts |
| Polycarbonate (PC) | Transparent, high impact strength, heat resistant | Lens covers, medical devices, safety equipment |
| Polypropylene (PP) | Chemical resistant, flexible, low cost | Living hinges, containers, automotive parts |
| Nylon (PA6/PA66) | Strong, wear-resistant, good lubricity | Gears, bushings, structural components |
| Acetal (POM) | High stiffness, low friction, dimensional stability | Precision gears, bearings, valve components |
| PEEK | High-temperature resistance, chemically inert | Aerospace, medical implants, oil & gas |
Additives and Fillers
- Glass Fiber: Increases strength and stiffness (e.g., glass filled nylon #621, V590).
- Flame Retardants: Meet safety standards like UL94 V-0.
- UV Stabilizers: Protect outdoor parts from sunlight degradation.
- Colorants: Achieve specific aesthetic requirements.
Material substitution to save costs can backfire. Always verify that the material’s mechanical and thermal properties meet your application’s long-term requirements.
Our comprehensive material selection guide
Injection Mold Design Essentials
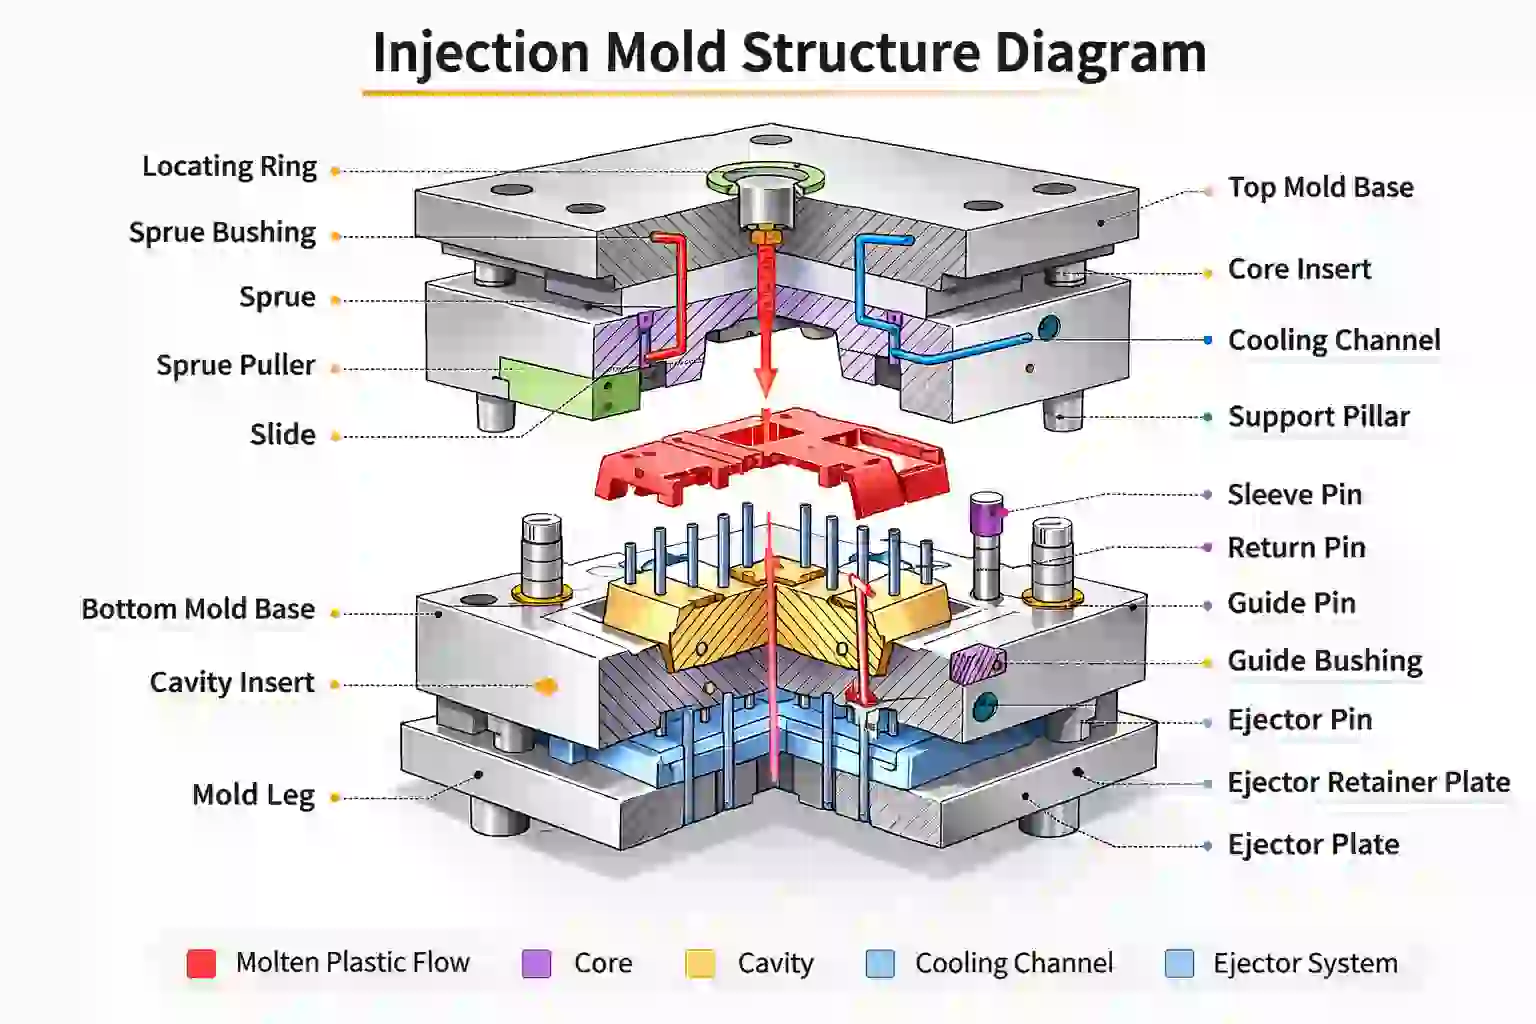
The mold is the heart of the injection molding process. A well-designed mold ensures part quality, cycle efficiency, and tool longevity.
Key Design Features
- Draft Angles: Tapered surfaces (typically 1-2 degrees) that allow the part to eject cleanly. Without draft, parts may stick or get damaged.
- Uniform Wall Thickness: Variations in thickness cause differential cooling, leading to warpage and sink marks.
- Ribs and Bosses: Add strength without increasing wall thickness. Ribs should be 50-60% of the nominal wall thickness.
- Radii and Fillets: Sharp corners create stress concentrations. Always use radii where possible.
- Gates and Runners: The entry point for molten plastic. Gate type and location affect fill pattern, weld lines, and aesthetics.
Mold Types
- Two-Plate Molds: Simplest and most common.
- Three-Plate Molds: Allow for multiple gate locations and automatic runner separation.
- Hot Runner Molds: Keep the material molten in the runner, eliminating waste and reducing cycle times.
- Family Molds: Produce multiple different parts in one cycle, ideal for assemblies.
- Insert Molds: Encapsulate metal or other components within the plastic part.
Learn about our mold design and engineering services
Common Injection Molding Defects and Troubleshooting
Even with perfect design, defects can occur. Understanding them helps you identify problems early.
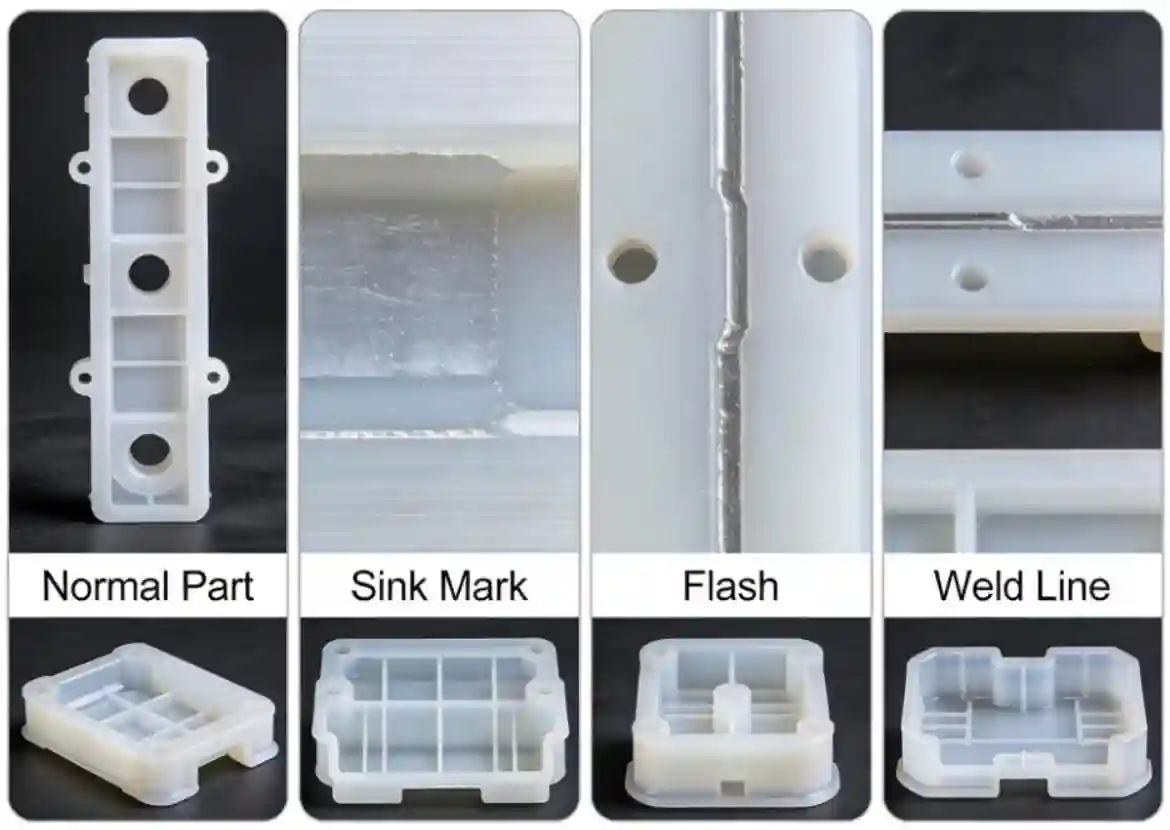
Sink Marks
Depressions on thick sections caused by insufficient cooling or holding pressure.
Solution: Increase holding pressure/time, reduce wall thickness, or relocate gates.
Weld Lines
Visible lines where two flow fronts meet, potentially weakening the part.
Solution: Increase melt temperature, improve venting, or relocate gates.
Flash
Thin film of excess plastic at the parting line, often due to high injection pressure or mold damage.
Solution: Reduce injection pressure, increase clamp force, or repair the mold.
Warpage
Distortion caused by uneven cooling or material shrinkage.
Solution: Ensure uniform wall thickness, optimize cooling channel design, or use materials with lower shrinkage.
Short Shots
Incomplete filling of the cavity.
Solution: Increase injection pressure/speed, raise melt temperature, or improve venting.
Burn Marks
Black or brown discoloration caused by trapped air igniting or material degradation.
Solution: Improve venting, reduce injection speed, or lower melt temperature.
Frequently Asked Questions
Q1: What is the typical cycle time for injection molding?
A: Cycle times vary widely based on part size and wall thickness. Small parts may cycle in 10-15 seconds, while large parts can take 60 seconds or more. Cooling time is often the longest phase.
Q2: Can injection molding be used for prototyping?
A: Yes. Rapid injection molding (using aluminum molds) is a cost-effective way to produce 50-10,000 parts for market testing before committing to production tooling.
Q3: How long does an injection mold last?
A: Production molds made from hardened tool steel can last for millions of cycles. Aluminum molds are suitable for lower volumes (thousands to tens of thousands).
Q4: Is injection molding environmentally friendly?
A: Thermoplastics can be reground and recycled. Many manufacturers now use recycled content and bio-based plastics to reduce environmental impact.
Our injection molding troubleshooting expertise
Injection Molding Cost Factors
Understanding what drives injection molding cost helps you budget effectively and identify savings opportunities.
1. Mold Cost (Tooling)
The single largest upfront investment. Complexity, cavity count, and steel type all affect price. A simple single-cavity mold may cost $3,000-$10,000, while complex multi-cavity production molds can exceed $100,000.
2. Material Cost
Material price per kilogram varies significantly. Engineering plastics like PEEK cost much more than commodity plastics like PP.
3. Cycle Time
Faster cycles mean more parts per hour, reducing per-part cost. Design for manufacturability (DFM) can significantly impact cycle time.
4. Part Complexity
Complex geometries requiring slides, lifters, or unscrewing mechanisms increase mold cost and cycle time.
5. Volume
Higher volumes spread the tooling cost over more parts, lowering the per-part price. However, very high volumes may require multi-cavity tools.
6. Secondary Operations
Assembly, printing, plating, or packaging add cost. Consider integrating features to minimize post-molding work.
The cheapest quote isn’t always the best value. Low-cost molds may fail prematurely, and cheap materials may lead to field failures that cost far more than the initial savings.
Applications Across Industries
Injection molding serves virtually every industry. Here’s how:
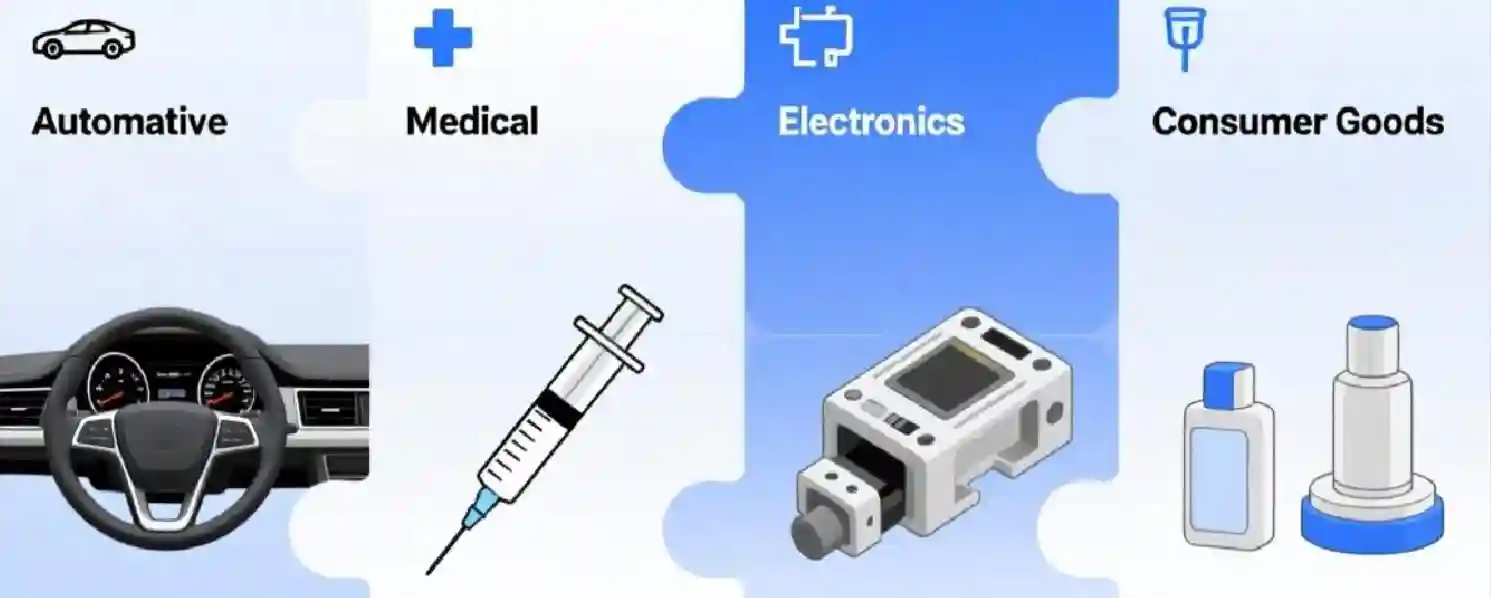
- Automotive: Dashboard components, connectors, under-hood parts
- Medical: Syringes, IV components, surgical instrument handles
- Consumer Goods: Appliance housings, toys, kitchenware
- Electronics: Enclosures, connectors, insulators
- Industrial: Gears, valves, pump components
- Packaging: Bottle caps, containers, closures
Explore our industry-specific solutions
How to Choose an Injection Molding Partner
Selecting the right manufacturer is as important as the design itself.
Key Evaluation Criteria
- Technical Expertise: Do they offer DFM feedback? Can they handle your material and complexity?
- Quality Certifications: ISO 9001, ISO 13485 (medical), IATF 16949 (automotive)
- Equipment Capabilities: Machine tonnage, all-electric vs. hydraulic, auxiliary equipment
- Communication: Are they responsive? Do they ask intelligent questions?
- References and Case Studies: Have they done similar work?
A partner who doesn’t challenge your design may be leaving money—and quality—on the table. The best partners ask hard questions early.
Conclusion
Injection molding remains the gold standard for producing high-quality plastic parts at scale. By understanding the injection molding process, material options, design principles, and cost drivers, you’re better equipped to bring your products to market efficiently and cost-effectively.
At Miracles Manufacturing, we combine decades of injection molding expertise with state-of-the-art facilities to deliver precision parts for automotive, medical, industrial, and consumer applications. Whether you need DFM analysis, mold design assistance, or high-volume production, our team is ready to partner with you.